FIXEdge Active-Passive Failover Cluster Deployment Guide
- AntonA (Unlicensed)
- Artem Kleshchev (Unlicensed)
- vladimir_karyakin (Unlicensed)
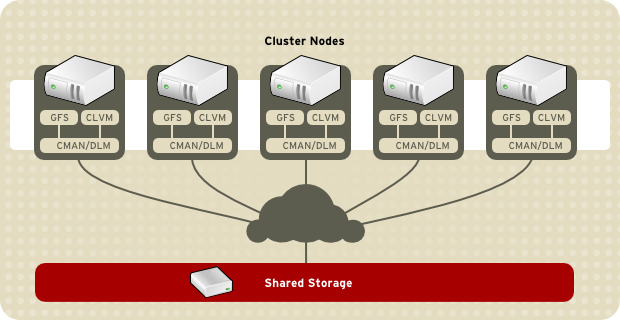
Linux cluster
To service multiple FIX sessions reliably, FIXEdge can be deployed in a Linux HA cluster (Red Hat High-Availability Add-on Overview) with 2 or 3 nodes and shared storage for keeping a session's state.
The possible configurable options of shared state are:
- For a shared physical device
- For a shared operational system (Gluster FS)
- FIXEdge Logs Replicator
- DRBD
The cluster solution utilizes Corosync and Pacemaker – tools that facilitate the HA Linux cluster for applications that do not have native support for clustering.
This article describes the Active-Passive / Hot-Warm Failover Cluster.
- Active or Hot node - is a working FIXEdge node getting runtime messages
- Passive or Warm node - is a FIXEdge node getting periodic updates from an active one, and ready to start if the main one fails.
Virtual IP
FIXEdge nodes use virtual IP as an entry point for FIX Clients and remote administrating tools (for example FIXICC). Virtual IP is assigned to the node when it is active.
This approach gives a working, highly-available solution and works well for active-passive clusters with few nodes and static FIX session configuration.
Health checks
Health checks are used to figure out if a node or an application that runs on the node is operating properly.
The simplest way to do a node health check is to monitor the FIXEdge PID file.
More precise checks:
- Check the system status via FIXEdge Admin REST API by sending the special GET Request
- Establish FIX Admin monitoring session.
Shared physical device
Shared storage might be a SAN-attached device, Fibre channel attached device or TCP/IP attached device. The device might be attached to all nodes simultaneously, or the cluster resource manager can attach it to the active node only. The device might, in turn, be a resilient one, presenting the distributed file system with software or hardware replication between filesystem nodes. In the case of a geographically distributed cluster, the shared storage also can be distributed geographically in the same way as cluster nodes, and the cluster resource manager can attach the storage instance to the node in the same geo-location.
Two or three nodes constitute a cluster and at any moment only one of them can be running on FIXEdge. When a failure of the active FIXEdge node is detected, the shared FIX message file system storage is unmounted on that node and mounted on the second node. Then, FE is started on the second node. All sessions are handled by one active server and will be started on another node in case of failure.
FIXEdge start-up time increases with the number of the session it serves.
The current approach prevents load balancing between the cluster nodes.
The problem with balancing the load is resolved in this solution: FIXEdge NGE
Multiple FIXEdge nodes need to have a consistent view of the FIX sessions' state, which includes the messages and sequence numbers.
This can be done with multiple approaches.
- The simplest is to use a shared network filesystem (e.g. NFS share)
The drawback is significantly increased latency (approx 20 times slower). - The recommended configuration is to use a SAN storage that can be attached to each of the cluster nodes.
The storage itself is a block device that is mounted on the node where FIXEdge is running.
This approach allows having shared storage for all nodes while keeping I/O latency low.
Environment Requirements
The following instructions are for CentOS/RedHat 7. They don't work for CentOS/RedHat 6.
- Network:
- The channel between FE and data provider - max wide
- dedicated network for cluster synchronization (heartbeats)
- Open ports:
high-availabilityservice- 8005/tcp
- 8901/tcp
- 8905/tcp
- 1234/udp
- Application:
- 1 Core per 1 Data Provider (recommended for latency)
- 1G for binaries
- Collocated nodes in one DC for max performance
- Health-check interval sufficient for FIXEdge to start
- Storage:
- Mandatory Fibre Channel SAN storage for session logs - 1.5 TB, directly attached to both nodes. Encrypted via standard LVM features.
- Mandatory STONITH to ensure that FC storage is mounted on a single node
- Mandatory Archive for session logs - https://b2bits.atlassian.net/wiki/display/B2BITS/FIXEdge+Capacity
- Shared storage (NFS/SMB) for configuration - can be slow.
- Experimental features:
- Start/stop from FIXICC - concept conflicts with cluster control.
- Operating system: RHEL 7 or newer.
Deployment Diagram

Scheduled Tasks
- Start FIXEdge at start-of-day - via pacemaker per FE resource by enabling resources (fixegde).
- Stop FIXEdge at end-of-day, for maintenance hours - via pacemaker by disabling resources (fixegde).
- Log archiving - mandatory for FIXEdge operation, FIXEdge needs available space on the
/opt/fixedge/FIXEdge1/logdirectory, so a periodic archiving of the files and directory cleanup is required.
Filesystem Layout
| Directory | Location | Purpose |
|---|---|---|
/opt/fixedge | local filesystem | FIXEdge installation directory |
/opt/fixedge/FIXEdge1/conf | NFS share | FIXEdge configuration |
/opt/fixedge/FIXEdge1/log | SAN storage | FIXEdge logs, mounted on a single node at a time by pacemaker |
How to Deploy
Install cluster software
Instructions below should be run on each cluster node. Superuser privileges are required for all the steps.
Install packages from a repository:
yum install corosync pcs pacemaker
Set the password for the
haclusteruser:passwd hacluster
Open ports on the firewall:
firewall-cmd --add-service=high-availability
firewall-cmd --runtime-to-permanent
Enable cluster services to run at system start-up:
systemctl enable pcsd corosync pacemaker
Install FIXEdge
To install FIXEdge you first need the following artifacts:
- the FIXEdge package (
fixedge.tar.gz) - FIXEdge
systemdintegration configuration (fixedge-systemd.tar.gz) - the license (
engine.license).
Superuser privileges are required for all the steps.
Install the FIXEdge RPM package:
mkdir --parents /opt/fixedge
tar --extract --file fixedge.tar.gz --directory /opt/fixedge
Unpack the FIXEdge
systemdintegration configuration:tar --extract --file fixedge-systemd.tar.gz --directory /
Add a user and a group for FIXEdge:
groupadd --system fixedge
useradd --system --gid fixedge --home-dir /opt/fixedge --shell /sbin/nologin --comment "Account to own and run FIXEdge" fixedge
Change ownership of FIXEdge to the dedicated user:
chown --recursive fixedge:fixedge /opt/fixedge
Copy the license:
cp engine.license /opt/fixedge
Enable the FIXICC Agent to start at the system start-up:
systemctl enable fixicc-agent
Firewall Configuration
Open ports for FIXEdge on the firewall:
firewall-cmd --add-port=8005/tcp --add-port=8901/tcp --add-port=8903/tcp --add-port=8905/tcp --add-port=1234/udp
firewall-cmd --runtime-to-permanent
Prepare Storage for the Session Logs and the Configuration
At this point, FIXEdge is deployed locally. Now, we need to make the configuration and the state shared.
- Make an NFS share, copy files from
/opt/fixedge/FIXEdge1/confto the share and mount it to/opt/fixedge/FIXEdge1/conf.
Use a Dual-Port SAN Device
Create an LVM volume group for the shared session logs storage:
vgcreate shared_logs_group <SAN_STORAGE_DEVICE>
replace
SAN_STORAGE_DEVICEwith the actual device name of SAN storage.Create a logical volume for the session logs:
lvcreate shared_logs_group --extents 100%FREE --name shared_logs
Prepare the logs storage, these commands must be executed on a single node.
Create a filesystem on the logical volume:
mkfs -t xfs /dev/shared_logs_group/shared_logs
Mount the filesystem:
mount /dev/shared_logs_group/shared_logs /opt/fixedge/FIXEdge1/log
Create a FIXEdge log directory structure:
mkdir /opt/fixedge/FIXEdge1/log/archive /opt/fixedge/FIXEdge1/log/backup
Unmount and deactivate:
umount /opt/fixedge/FIXEdge1/log
vgchange -a n shared_logs_group
Set up a FIXEdge Cluster
Now we need to set up cluster resources for FIXEdge. Superuser privileges are required for all the steps.
Authorize nodes for
haclusteruser:pcs cluster auth NODE_1_NAME NODE_2_NAME -u hacluster
Where
NODE_1_NAMEandNODE_2_NAMEare the hostnames of the servers that run FIXEdge.Note that these names must not resolve to127.0.0.1locally or use IP addresses instead of the hostnames.Create the cluster and add nodes:
pcs cluster setup --force --name fixedge_ha NODE_1_NAME NODE_2_NAME
Where
NODE_1_NAMEandNODE_2_NAMEare the hostnames of the servers that run FIXEdge.Note that these names must not resolve to127.0.0.1locally or use IP addresses instead of the hostnames.Start cluster
pcs cluster start --all
Now the cluster is starting up, you can check its status with commands:
pcs status cluster
pcs status nodes
Disable resource migration on the first failure, since restarting on the same node takes less time than migration to another node:
pcs property set start-failure-is-fatal=false
For a two-node cluster we must disable the quorum, but do not do this for a three-node cluster. Quorum avoids the situation when the cluster cannot decide which node is active.
pcs property set no-quorum-policy=ignore
Add a virtual IP as a resource to the cluster:
pcs resource create virtual_ip ocf:heartbeat:IPaddr2 ip=<VIRTUAL_IP> cidr_netmask=32 op monitor interval=30s
where
<VIRTUAL_IP>is the IP that will be used by the FIX clients to connect to the cluster.
Use a Dual-Port SAN Device
Add an LVM group for the sessions' logs as a resource to the cluster:
pcs resource create logs_vg ocf:heartbeat:LVM volgrpname=logs
Add a filesystem for the sessions' logs as a resource to the cluster:
pcs resource create logs_fs ocf:heartbeat:Filesystem device=/dev/shared_logs_group/shared_logs directory=/opt/fixedge/FIXEdge1/log fstype=xfs
Add FIXEdge as a resource to the cluster:
pcs resource create fixedge systemd:fixedge op start timeout=300s op stop timeout=60s op monitor interval=10 timeout=60s meta migration-threshold=3
Make sure that all resources are started on the same node:
pcs constraint colocation set virtual_ip logs_vg logs_fs fixedge sequential=true setoptions score=INFINITY
Make sure that resources are started in the proper order:
pcs constraint order set virtual_ip logs_vg logs_fs fixedge
Starting and stopping FIXEdge cluster resource from FIXICC
To avoid issues related to unexpected behavior by cluster software the user should prepare scripts that use cluster management commands.
Create scripts:
bin/FixEdge1.run.cluster.sh
bin/FixEdge1.run.cluster.shpcs resource enable fixedge
This script is used for starting FIXEdge service as a cluster resource
bin/FixEdge1.stop.cluster.sh
bin/FixEdge1.stop.cluster.shpcs resource disable fixedge
This script is used for stopping FIXEdge service as a cluster resource
Update the paths to start and stop scripts in the fixicc-agent/conf/agent.properties.
StartFile = bin/FixEdge1.run.sh

StopFile = bin/FixEdge1.stop.sh
The user who runs fixicc-agent should have permission to operate the cluster. In some cases, it is required to add sudo for running pcs commands
The script will log to console so usually for troubleshooting and debugging purposes the scripts should be extended with the logic of forwarding standard and error output with timestamps to some file
How to Validate the Installation
Use FIXICC to connect to the cluster nodes: add servers with addresses of the cluster nodes. FIXICC will show one server running and another stopped.
Use FIX Client Simulator to connect to FIXEdge via Virtual IP.
Cluster logs are located at /var/log/cluster .
FIXEdge logs are at /opt/fixedge/FIXEdge1/log/FixEdge.log , /opt/fixedge/fixicc-agent/logs/fixicc-agent.log , and /opt/fixedge/fixicc-agent/logs/wrapper.log
- Search for FATAL and ERROR entries in the logs
- Contact support (SupportFIXAntenna@epam.com) and provide the logs.
Open https://NODE_1_NAME:2224/ to access the pacemaker's WebUI. It provides means for inspecting the state of the cluster nodes and resources. Under normal operation, all nodes and resources must be running. All resources must be running the same node.


Try stopping the active node (shut it down), the resources will be moved to another node.
Setting up GlusterFS Server
In general, the cluster might look like this:
In this setup, the TCP/IP attached device is used. A two-node GlusterFS file server with mirroring is used as the shared device. The device is mounted to both nodes simultaneously. See the diagram below:

Reference articles:
http://www.sohailriaz.com/glusterfs-howto-on-centos-6-x/
Install software
Do these steps on both servers: NODE_1_NAME and NODE_2_NAME
Download and install:
$ sudo wget -P /etc/yum.repos.d http://download.gluster.org/pub/gluster/glusterfs/LATEST/CentOS/glusterfs-epel.repo
$ sudo yum install glusterfs
$ sudo yum install glusterfs-fuse
$ sudo yum install glusterfs-server
Check installed version:
$ glusterfsd --version

glusterfs 3.6.2 built on Jan 22 2015 12:58:10
Repository revision: git://git.gluster.com/glusterfs.git
Copyright (c) 2006-2013 Red Hat, Inc. <http://www.redhat.com/>
GlusterFS comes with ABSOLUTELY NO WARRANTY.
It is licensed to you under your choice of the GNU Lesser
General Public License, version 3 or any later version (LGPLv3
or later), or the GNU General Public License, version 2 (GPLv2),
in all cases as published by the Free Software Foundation.
Start glusterfs services on all servers and enable them to start automatically on startup:
$ sudo /etc/init.d/glusterd start
$ sudo chkconfig glusterfsd on
Configure
Do these steps only on one server. For example, on EVUAKYISD105A.kyiv.epam.com
add EVUAKYISD105D to the trusted storage pool:
$ sudo gluster peer probe EVUAKYISD105D.kyiv.epam.com
Now we can check the status:
$ sudo gluster peer status
Number of Peers: 1
Hostname: EVUAKYISD105D.kyiv.epam.com
Uuid: 04126ea4-a0e5-4854-a38e-69c24d9c05aa
State: Peer in Cluster (Connected)
On both nodes create a folder to be shared:
$ cd /
$ sudo mkdir data
$ sudo chmod a+rwx /data
Create the storage share and start it:
$ sudo gluster volume create clusterdata replica 2 transport tcp EVUAKYISD105A.kyiv.epam.com:/data EVUAKYISD105D.kyiv.epam.com:/data force

volume create: clusterdata: success: please start the volume to access data

$ sudo gluster volume start clusterdata

volume start: clusterdata: success

$ sudo gluster volume info


Volume Name: clusterdata
Type: Replicate
Volume ID: fa31c2de-f7d6-4f05-97e5-e310d2680d94
Status: Started
Number of Bricks: 1 x 2 = 2
Transport-type: tcp
Bricks:
Brick1: EVUAKYISD105A.kyiv.epam.com:/data
Brick2: EVUAKYISD105D.kyiv.epam.com:/data
Mounting GlusterFS storage on FIXEdge cluster nodes
These commands shall be run on both FIXEdge nodes: NODE_1_NAME and NODE_2_NAME
Install client components:
$ sudo wget -P /etc/yum.repos.d http://download.gluster.org/pub/gluster/glusterfs/LATEST/CentOS/glusterfs-epel.repo
$ sudo yum install glusterfs-client
Mount remote storage:
$ sudo mkdir /data
$ sudo chmod a+rwx /data
$ sudo mount.glusterfs EVUAKYISD105D.kyiv.epam.com:/clusterdata /data

$ mount
/dev/mapper/VolGroup00-LogVol00 on / type ext4 (rw,noatime,nodiratime,noacl,commit=60,errors=remount-ro)
proc on /proc type proc (rw)
sysfs on /sys type sysfs (rw)
devpts on /dev/pts type devpts (rw,gid=5,mode=620)
tmpfs on /dev/shm type tmpfs (rw)
/dev/sda1 on /boot type ext4 (rw)
none on /proc/sys/fs/binfmt_misc type binfmt_misc (rw)
EVUAKYISD105D.kyiv.epam.com:/clusterdata on /data type fuse.glusterfs (rw,default_permissions,allow_other,max_read=131072)
And now add the following line to /etc/fstab to ensure mounting after reboot:
EVUAKYISD105A.kyiv.epam.com:/clusterdata /data glusterfs defaults,_netdev 0 0
Setting up FIXEdge instances
Copy the FixEdge-*.tar.gz Linux package to /home/user to both nodes: NODE_1_NAME and NODE_2_NAME
On Node1
Unpack the FIXEdge-x.x.x.tar.gz archive to /home/user/
$ tar xf FixEdge-5.8.2.68334-Linux-2.6.32-gcc447-x86_64.tar -C /home/user/
The installation directory will be /home/user/FIXEdge:
- Copy the license 'engine.license' to the /home/user/FIXEdge folder.
Move FIXEdge configuration and logs directory to shared storage mounted to /data:
mv FIXEdge1 /data/
- Edit scripts in /home/user/FIXEdge/bin to direct them to the new FIXEdge instance location:
- replace ".." with "/data".
- Edit FIXICC Agent configuration:
- /home/user/FIXEdge/fixicc-agent/conf/wrapper.conf
- wrapper.daemon.pid.dir = ${wrapper_home}
- /home/user/FixEdge/fixicc-agent/conf/agent.properties
- EngineProperty = /data/FIXEdge1/conf/engine.properties
- FIXEdgeFileSettings = /data/FIXEdge1/conf/FIXEdge.properties
- LogUrl = /data/FIXEdge1/log
- /home/user/FIXEdge/fixicc-agent/conf/wrapper.conf
- Edit FIXEdge and engine configuration:
- /data/FixEdge1/conf/engine.properties
- EngineRoot = /data
- LicenseFile = /home/user/FIXEdge/engine.license
- /data/FixEdge1/conf/FIXEdge.properties
- FIXEdge.RootDir = /data/FIXEdge1
- Log.File.RootDir = /data/FIXEdge1
- TransportLayer.SmtpTA.DllName = /home/user/FIXEdge/bin/libSMTPTA.so
- /data/FixEdge1/conf/engine.properties
Install and Start FIXICC Agent daemon:
$ cd /home/user/FIXEdge/fixicc-agent/bin
$ ./installDaemon.sh
$ ./startDaemon.sh
- Now everything is ready to run FIXEdge on Node 1.
Prepare to copy the installation to Node 2:
$ cd /home/user
$ tar cvf FixEdge.tar FixEdge
$ gzip FixEdge.tar
- Copy file FixEdge.tar.gz to Node2:/user/home
On Node2
Unpack the FIXEdge-x.x.x.tar.gz archive to /home/user/
$ tar xf FixEdge-5.8.2.68334-Linux-2.6.32-gcc447-x86_64.tar -C /home/user/
Install and Start the FIXICC Agent daemon:
$ cd /home/user/FIXEdge/fixicc-agent/bin
$ ./installDaemon.sh
$ ./startDaemon.sh
Open ports on both nodes
8005 for FIXICC Agent and 8901 for FIX Engine
$ sudo iptables -I INPUT -p tcp -m state --state NEW -m tcp --dport 8005 -j ACCEPT
$ sudo iptables -I INPUT -p tcp -m state --state NEW -m tcp --dport 8901 -j ACCEPT
$ sudo service iptables save
Configuring a failover cluster for FIXEdge with Pacemaker, Corosync & PCS
Reference articles:
https://github.com/feist/pcs/issues/
On both nodes, install the needed software:
$ sudo yum install corosync pcs pacemaker
On both nodes, set the password for hacluster user ('epmc-cmcc' was used):
$ sudo passwd hacluster
Configure Firewall on both nodes to allow cluster traffic:
$ sudo iptables -I INPUT -m state --state NEW -p udp -m multiport --dports 5404,5405 -j ACCEPT
$ sudo iptables -I INPUT -p tcp -m state --state NEW -m tcp --dport 2224 -j ACCEPT
$ sudo iptables -I INPUT -p igmp -j ACCEPT
$ sudo iptables -I INPUT -m addrtype --dst-type MULTICAST -j ACCEPT
$ sudo service iptables save
Start the pcsd service on both nodes:
$ sudo systemctl start pcsd
From now on, all commands need to be executed on one node only. We can control the cluster by using PCS from one of the nodes.
Since we will configure all nodes from one point, we need to authenticate on all nodes before we are allowed to change the configuration. Use the previously configured hacluster user and password to do this:$ sudo pcs cluster auth NODE_1_NAME NODE_2_NAME Username: hacluster Password: NODE_1_NAME: Authorized NODE_2_NAME: Authorized
Create the cluster and add nodes. This command creates the cluster node configuration in /etc/corosync.conf.
$ sudo pcs cluster setup --name fixedge_cluster NODE_1_NAME NODE_2_NAME
Shutting down pacemaker/corosync services...
Redirecting to /bin/systemctl stop  pacemaker.service
Redirecting to /bin/systemctl stop  corosync.service
Killing any remaining services...
Removing all cluster configuration files...
NODE_1_NAME: Succeeded
NODE_2_NAME: Succeeded
We can start cluster now:
$ sudo pcs cluster start --all
NODE_1_NAME: Starting Cluster...
NODE_2_NAME: Starting Cluster...
We can check cluster status:
$ sudo pcs status cluster
Cluster Status:
 Last updated: Tue Jan 27 22:11:15 2015
 Last change: Tue Jan 27 22:10:48 2015 via crmd on NODE_1_NAME
 Stack: corosync
 Current DC: NODE_1_NAME (1) - partition with quorum
 Version: 1.1.10-32.el7_0.1-368c726
 2 Nodes configured
 0 Resources configured


$ sudo pcs status nodes
Pacemaker Nodes:
 Online: NODE_1_NAME NODE_2_NAME
 Standby:
 Offline:

$ sudo corosync-cmapctl | grep members
runtime.totem.pg.mrp.srp.members.1.config_version (u64) = 0
runtime.totem.pg.mrp.srp.members.1.ip (str) = r(0) ip(10.17.131.127)
runtime.totem.pg.mrp.srp.members.1.join_count (u32) = 1
runtime.totem.pg.mrp.srp.members.1.status (str) = joined
runtime.totem.pg.mrp.srp.members.2.config_version (u64) = 0
runtime.totem.pg.mrp.srp.members.2.ip (str) = r(0) ip(10.17.131.128)
runtime.totem.pg.mrp.srp.members.2.join_count (u32) = 1
runtime.totem.pg.mrp.srp.members.2.status (str) = joined


$ sudo pcs status corosync
Membership information
----------------------
    Nodeid      Votes Name
         1          1 NODE_1_NAME (local)
         2          1 NODE_2_NAME
Disable the STONITH option as we don't have STONITH devices in our demo virtual environment:
$ sudo pcs property set stonith-enabled=false
For a two-node cluster we must disable the quorum:
$ sudo pcs property set no-quorum-policy=ignore
$ sudo pcs property
Cluster Properties:
 cluster-infrastructure: corosync
 dc-version: 1.1.10-32.el7_0.1-368c726
 no-quorum-policy: ignore
 stonith-enabled: false
Add Virtual IP as a resource to the cluster:
$ sudo pcs resource create virtual_ip ocf:heartbeat:IPaddr2 ip=10.17.135.17 cidr_netmask=32 op monitor interval=30s
$ sudo pcs status resources
 virtual_ip (ocf::heartbeat:IPaddr2): Started
Add FIXEdge as a resource to cluster:
$ sudo pcs resource create FIXEdge ocf:heartbeat:anything params binfile="/home/user/FixEdge/bin/FIXEdge" cmdline_options="/data/FixEdge1/conf/FIXEdge.properties" user="user" logfile="/home/user/FIXEdge_resource.log" errlogfile="/home/user/FIXEdge_resource_error.log"
For some reason in the /usr/lib/ocf/resource.d/ of the installed cluster there are many missing agents, including ocf:heartbeat:anything. You need to modify the original version (which you can download here: https://github.com/ClusterLabs/resource-agents/blob/master/heartbeat/anything) to make it working. The working version of the agent is attached.
This file should be copied to /usr/lib/ocf/resource.d/ and make executable:
$ sudo cp anything /usr/lib/ocf/resource.d/heartbeat/
$ sudo chmod a+rwx /usr/lib/ocf/resource.d/heartbeat/anything
Also, to make this agent works the following lines shall be added to sudoers file:
$ sudo visudo
Defaults    !requiretty
user    ALL=(user)      NOPASSWD: ALL
root    ALL=(user)      NOPASSWD: ALL
In order to make sure that the Virtual IP and FIXEdge always stay together, we can add a constraint:
$ sudo pcs constraint colocation add FIXEdge virtual_ip INFINITY
To avoid the situation where the FIXEdge would start before the virtual IP is started or owned by a certain node, we need to add another constraint that determines the order of availability of both resources:
$ sudo pcs constraint order virtual_ip then FIXEdge
Adding virtual_ip FIXEdge (kind: Mandatory) (Options: first-action=start then-action=start)
After configuring the cluster with the correct constraints, restart it and check the status:
$ sudo pcs cluster stop --all && sudo pcs cluster start --all
NODE_1_NAME: Stopping Cluster...
NODE_2_NAME: Stopping Cluster...
NODE_2_NAME: Starting Cluster...
NODE_1_NAME: Starting Cluster...
- The cluster configuration is now completed.
Attachments
File | Size | Created | Comment |
|---|---|---|---|
| 587268 | Mar 06, 2015 21:49 | Modified Sender source code (Sending orders with incremented ClOrdID) | |
| 9475 | Jan 28, 2015 09:16 | ocf:heartbeat:anything agent for FIXEdge resource monitoring | |
| 4976201 | Mar 08, 2015 01:06 | Clients simulator (binary) | |
| 34 KB | Jan 20, 2020 |
FIX Logs Replicator
The FIX Antenna Replication tool (RT) is typically used for FIX session real-time replication on a backup host with FIX engine.
It is deployed on the primary FIX engine (server - publisher) and backup destination(s) (subscriber- client). RT uses a custom transfer protocol to synchronize FIX logs between the primary and backups hosts in real-time. It can be started at any time to resynchronize primary and backup FIX log files. It is highly optimized for high throughput to transfer data from multiple log files and to efficiently utilize bandwidth.
RT comes with an Admin interface to operate and monitor the state of the replication process.
FIXEdge Recovery Time Objective and Recovery Point Objective
The current article describes the Recovery Time Objective (RTO) and Recovery Point Objective(RPO) for Disaster recovery in case of active-passive Cluster configuration (see FIXEdge Failover Cluster installation).
Recovery Time Objective (RTO)
- Some functions are more important than others and may need a quicker recovery.
- The period of time within which systems, applications, or functions must be recovered after an outage is referred to as Recovery Time Objectives (RTOs).
- All business functions, applications, or vendors that require a business continuity plan must have an RTO.
Recovery Point Objective(RPO)
- An RPO is the maximum allowable amount of data loss an organization can tolerate as a result of an event which causes systems recovery (the transfer of work) to an alternative system environment or location.
- An RPO is applicable only to applications that store data and are evaluated using similar to RTO requirements.
The RPO is not the time it takes to restore data as part of recovery. The data restoration time is part of the RTO.
Failover scenario #1. Application or cluster node failure
Failure of software or hardware within a node (e.g. application failure, node unavailability, resource exhausting). Failover Cluster consists of several application nodes. In case one node fails, the application (or DB) is moved to another node and starts there within approximately 2 minutes.
The session recovery procedure happens automatically. The missing messages should be recovered with a resend request procedure automatically.
Session recovery requires a reset sequence in case of damaged storage. The messages from the beginning of the day will be lost when resetting the sequence. See Recovery procedure for a session with corrupted storages
FIX Standard recommends requesting sequences after logon using Message recovery procedure or use Extended features for FIX session and FIX connection initiation
Achievable RTO Values: "Greater than 0 seconds, up to and including 2 minutes"
Achievable RPO Values: "Recent synch point: Greater than 0 seconds, up to and including few seconds"
Failover scenario #2. Whole cluster failure
A disaster recovery environment should expect the connection. In case of disaster, the production environment is moved to DR.
Achievable RTO Values: "Greater than 0 seconds, up to and including few seconds"
Achievable RPO Values: "Recent synch point: Greater than 0 seconds, up to and including 1 day, i.e. since the start of the day".
Better RPO values can be achieved with additional configuration or tools like the log replication tool.
This procedure requires additional configuration for each client individually.